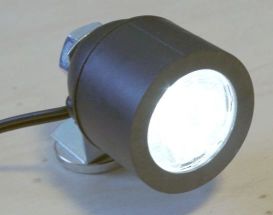
Luxeon LED Bicycle Headlight from Standard Parts
Summary
LED headlights offer a much whiter light color than traditional headlights. They are robust and long-lasting. They are more efficient than traditional bulbs, particularly at low power.
LED headlights differ from regular headlights in the way that the light source (the LED) needs cooling and that the optics are different. Conversion of a regular headlight to an LED headlight just by replacing the bulb with an LED yields a poor beam while the LED soon dies from overheat.
This project is about building a dedicated LED headlight from commonly available parts.
This is a single-LED headlight. You want more light ? Don't miss the triple-LED version.
Partlist
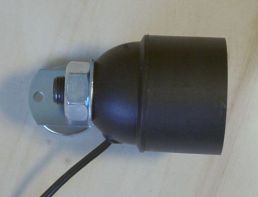
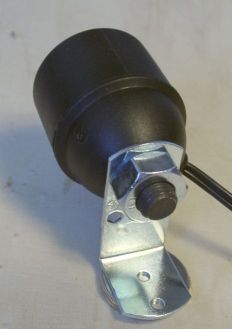
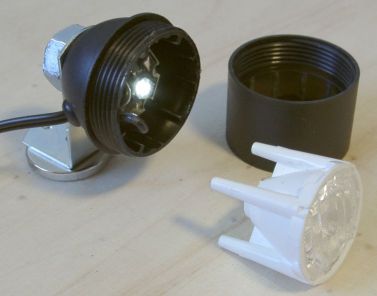
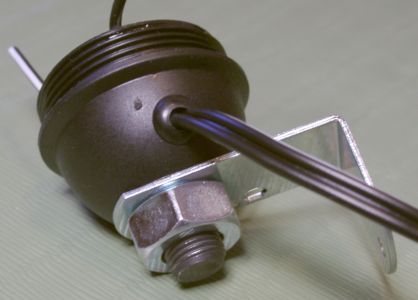
E27 Edison screw bulb socket with mounting bracket
M10 bolt of 25mm length, 1.0 thread (!)
M10 nut to match above
Collimator with holder (I use Fraen's elliptical type)
Luxeon Star LED
Heat-conductive glue (I use an Arctic Silver product)
Speaker cable
Rubber sleeve to fit cable
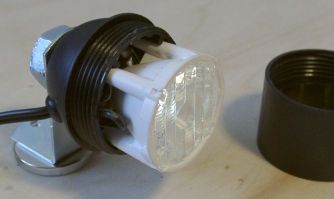
1.0 mm acrylic glass (cut from cheap safety goggles)
How To
- Discard contact block of bulb socket
- In rear part of bulb socket, drill hole for cable and rubber sleeve.
- Polish the head of the M10 bolt and drive it thru the rear part of the bulb holder
- Secure mounting bracket with M10 nut. You could use an alternative bracket to fit your bike.
- Mount cable and cable sleeve
- Solder LED to cable
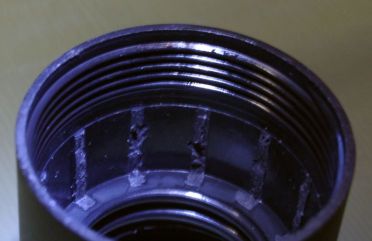
- Cut away ribs from inside front part of bulb holder (photo below)
- Cut away front part of bulb holder, so that a flat face remains. (I start with a jigsaw, then remove the last few mm with sand paper)
- Cut acrylic glass to size and fit it into the front part of the holder from inside
- Apply heat-conductive glue on head of bolt and place LED onto it
- Center LED with collimator
- Apply pressure on the collimator by screwing-on the head of the bulb holder
- Run abt 100mA of current thru the lamp to make the glue cure faster
- If improved heat dissipation is needed, add a large washer on the back of the lamp or shape the mounting bracket accordingly

BACK